
With Visual Stakeout (VSO) the virtual location of the point to be staked can be seen by a “flag” shown on the Triumph-VS camera image. This visual aid helps to navigate quickly to the point and makes stakeout jobs fast and fun.
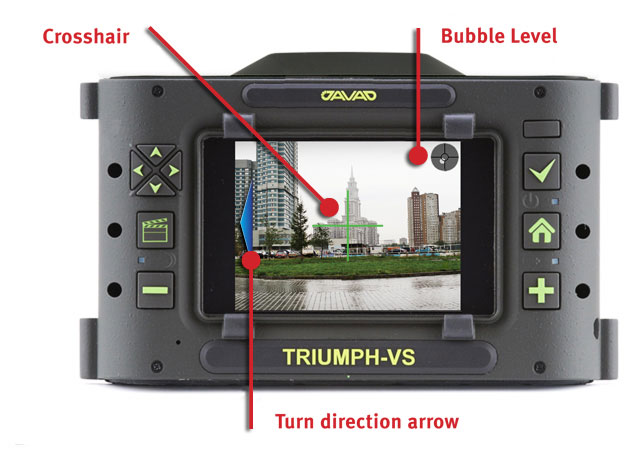
While at the VSO screen the camera picture will always be displayed. There will also always be a virtual bubble level in the top-right corner of the screen and a green crosshair at the center of the screen. The virtual bubble level performs just like a real, helping to keep the device horizontal. The crosshair shows the camera optical axis. Generally, VSO precision is better when the target point is close to the crosshair.
When there is a target point selected in regular stakeout mode, the VSO screen will display it in the camera picture. If the point is out of the camera’s field of view, a wide arrow will appear at the left or right of the screen, pointing to the closest turning direction to bring the target point into the field of view.
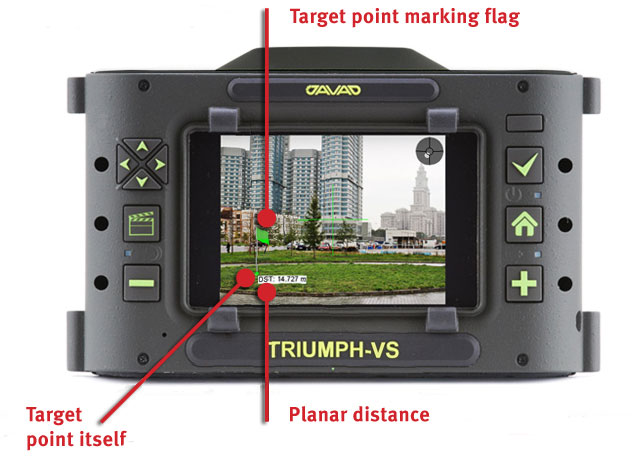
If the target point is in the front camera’s field of view, it will be marked with a small green circle and a flag of variable color. The green circle is displayed right at the target point and the flag will appear as if a real physical flag is placed at the point. Note the green circle has a constant size; the flag is always scaled to make it appear 1.6-meters tall: it becomes taller as you approach the point.
When near the target point, the horizontal distance is displayed. The distance is in meters if it’s smaller than 1 km, and in kilometers otherwise.
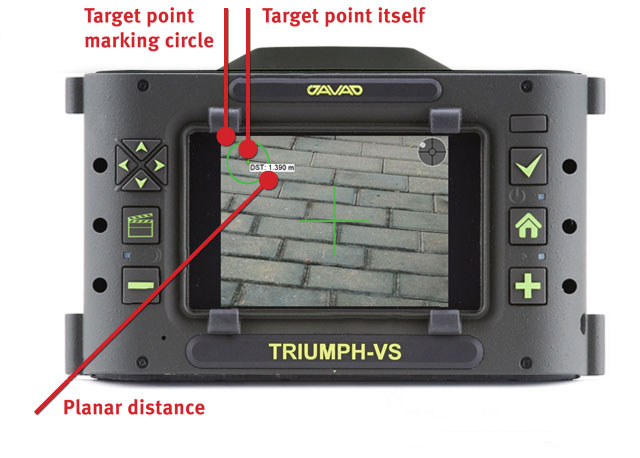
The flag color represents current position solution type: if green, it indicates RTK Fixed; if yellow, RTK Float; and if red, an autonomous or stand-alone solution.

As the target point is approached the device will automatically switch the view to the bottom camera. Displayed information remains the same as for the top camera except for the flag. The 1.6-meter flag is replaced with a 30-cm circle on the bottom camera display. The circle looks like a painted 30-cm circle around the target point. The circle color has the same meaning as the flag color for the top camera.
Note that the distance displayed is still horizontal distance.
Please follow this link to see a video demonstration: TRVS-VisualStakeout.mp4