J-Tip Users Manual

Print version

More Settings in Advanced screen.

Select Sensor and Directions in this screen.

2D scan view of the field.

Touch the center of the screen and use +/- buttons to zoom in and out.

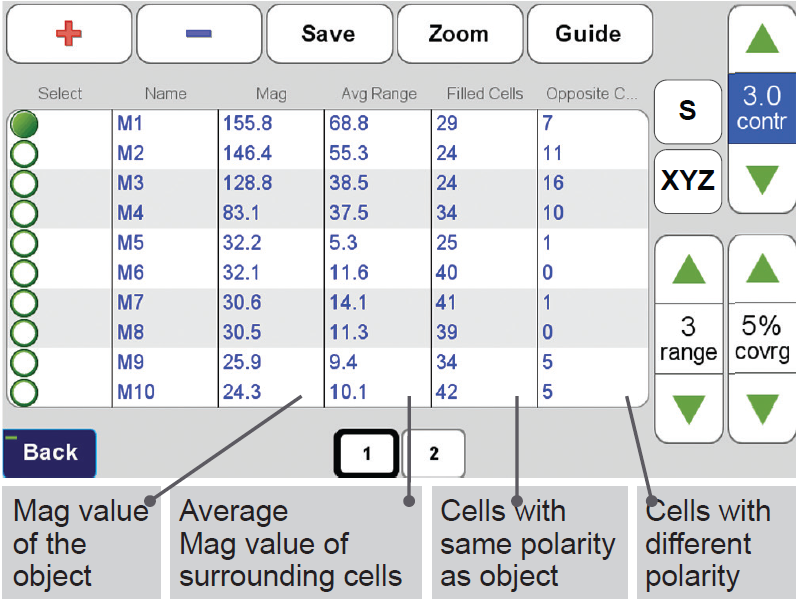
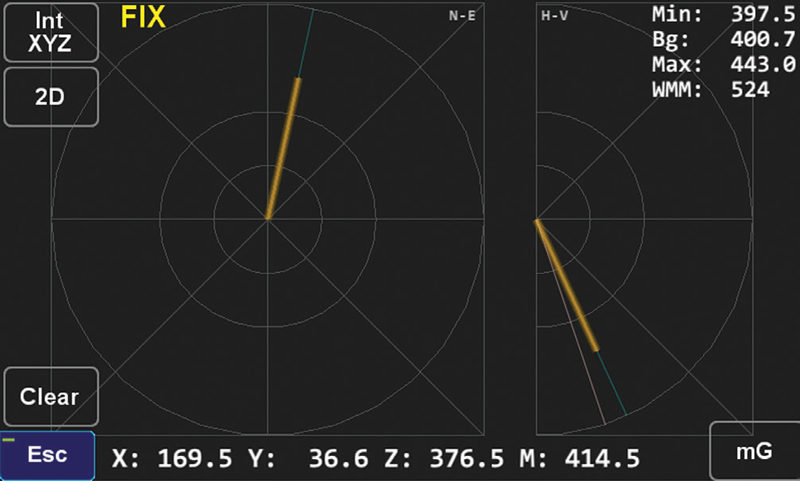
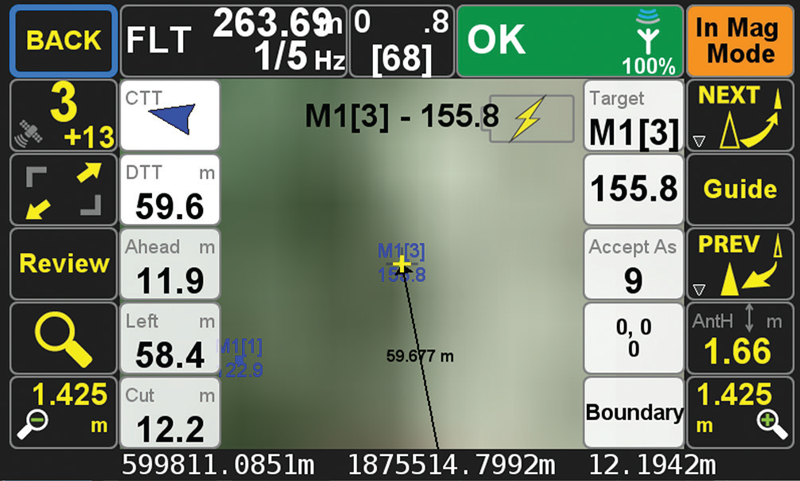
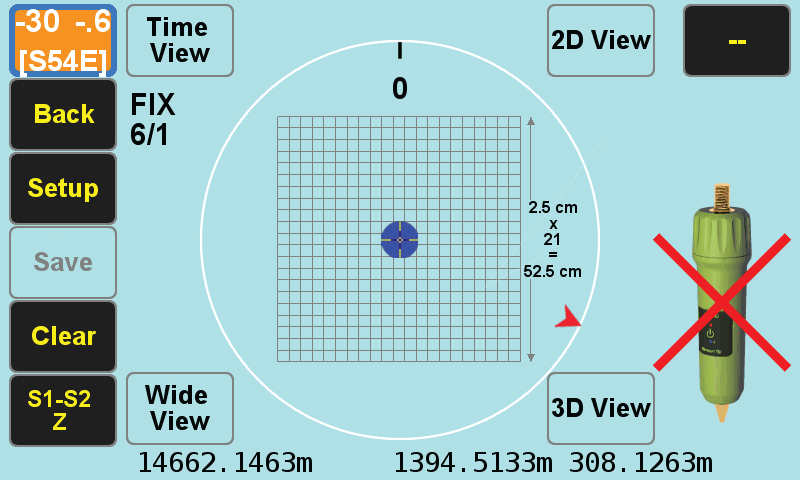
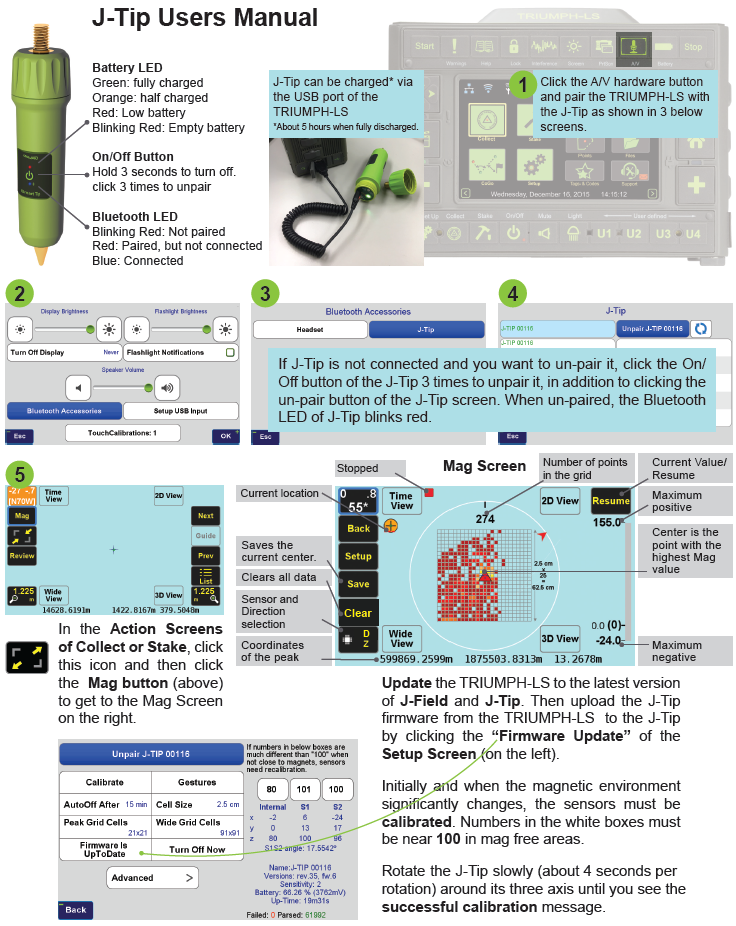
The Mag Screen focuses only on the mag object with the highest mag value.

Audio and the graphical bar on the right side of the Mag Screen show the magnitude of the magnetic object.

Audio settings are explained at the end of this document.

When RTK solutions are available, mag values will be geo-tagged and digitized as you scan the field.

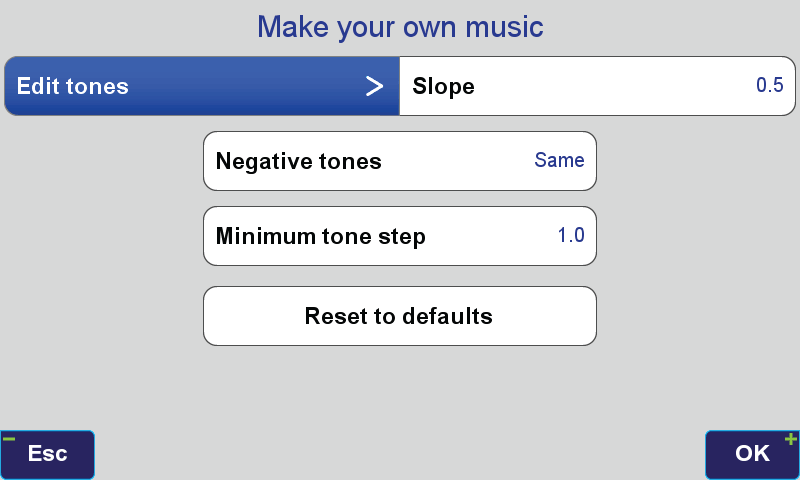
In “Setup” screen, “cell size” is the scan digitizing size.
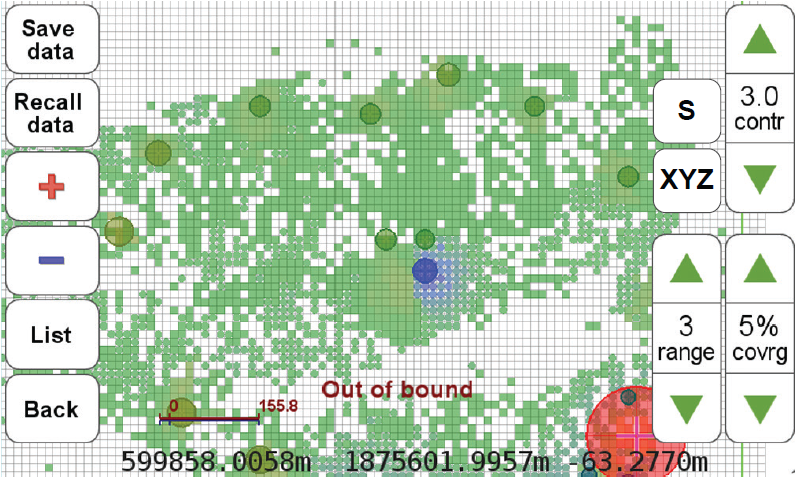
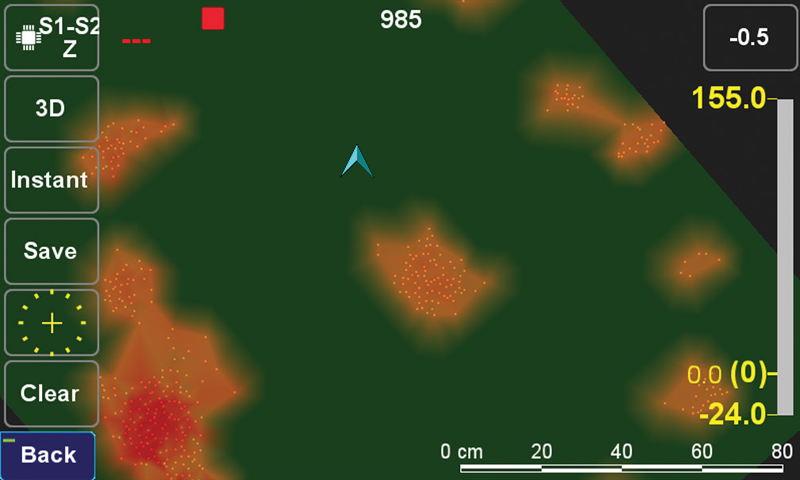
Peak Grid is the grid in the Mag screen and Wide Grid is the grid in the Wide View.

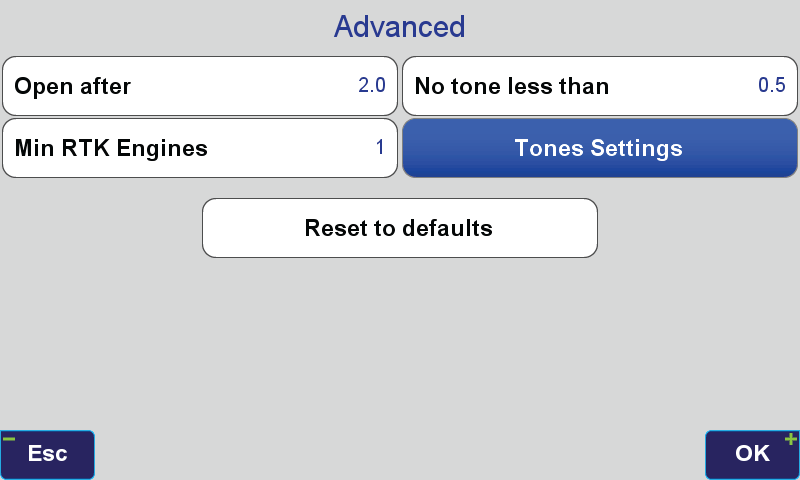
Open after: Start beeping when the change in mag value is more than the selected number. No tone less than: Don’t beep if the mag value is less than this number.

Min RTK Engines: Geo tag mag values when RTK has this many number of engines fixed.

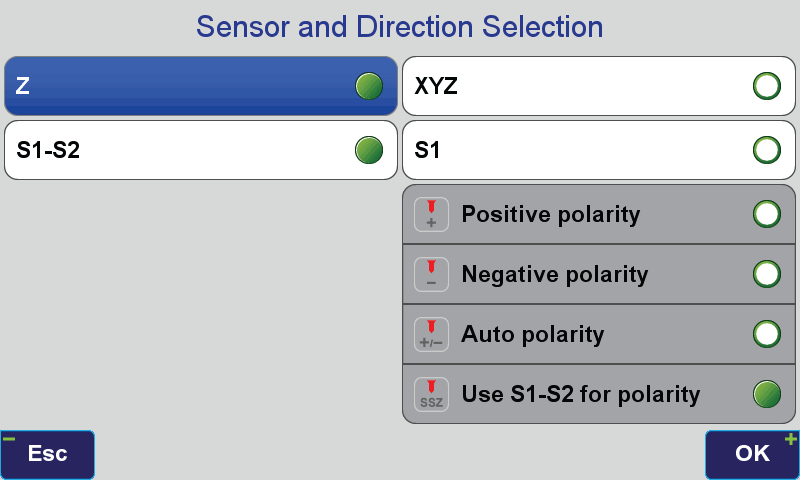
You can select Single (S, lower sensor) or Double sensors (D, lower and upper in differential mode) on Z or XYZ directions.

D sensors detects polarity instantly and you can start in any location.
In S only sensor polarity is selected as: Select the “+” option if you known the object is positive. You can start at any location. Select the “-“ option if you know the object is negative. You can start at any location. Select the “+/-“ when you don’t know the polarity. You must start from a clean area. Select the “DZ” option when you want to use the S sensor value as mag value and D for polarity detection.

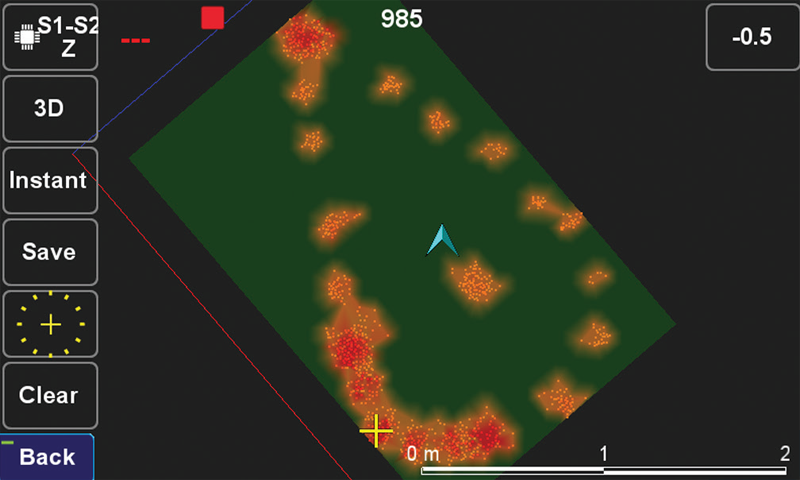
For the Mag graph, Wide View, 2D and 3D, if you select the S sensor, you must start in a clean area (at least one foot above the ground).

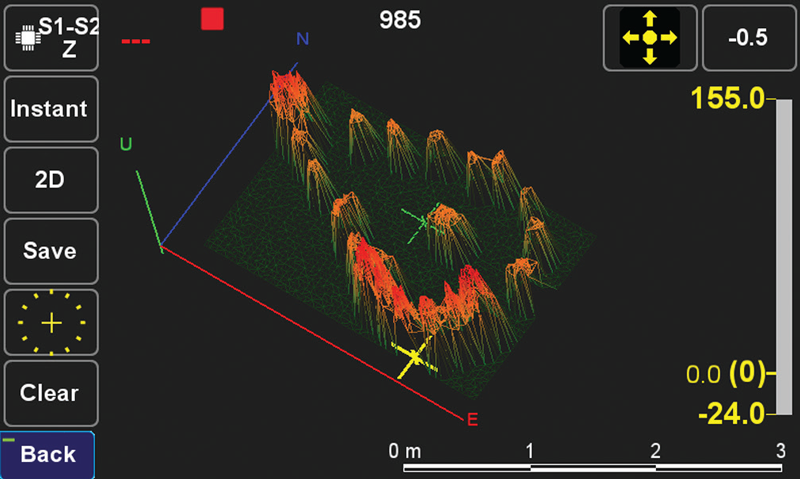
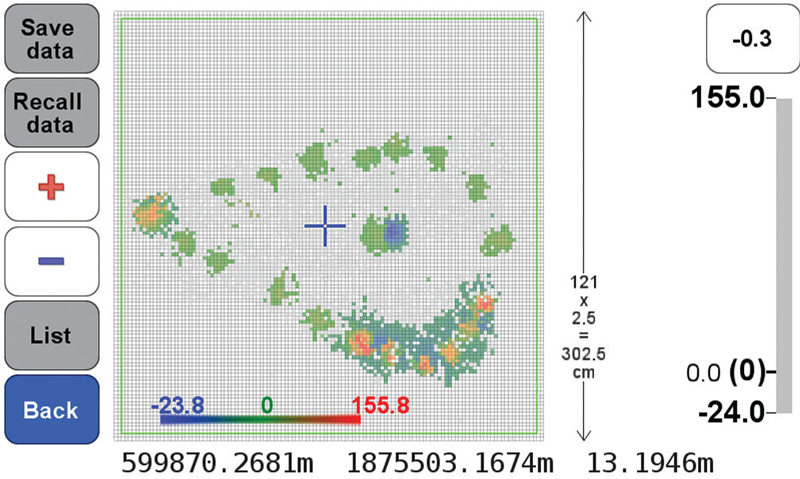
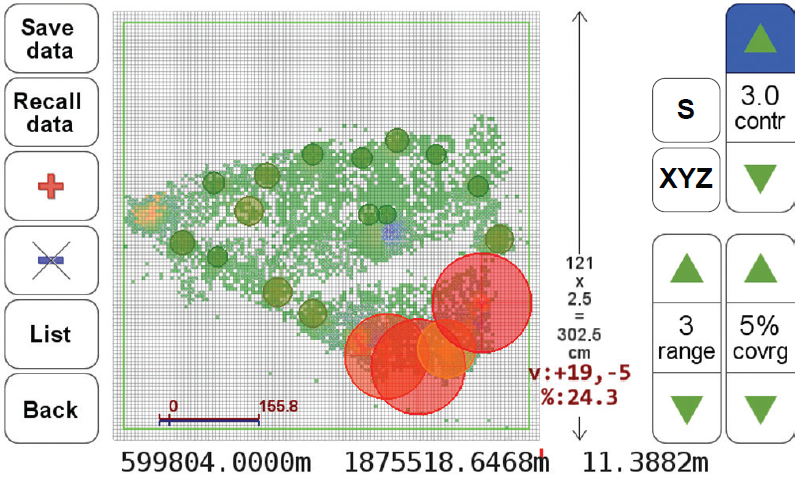
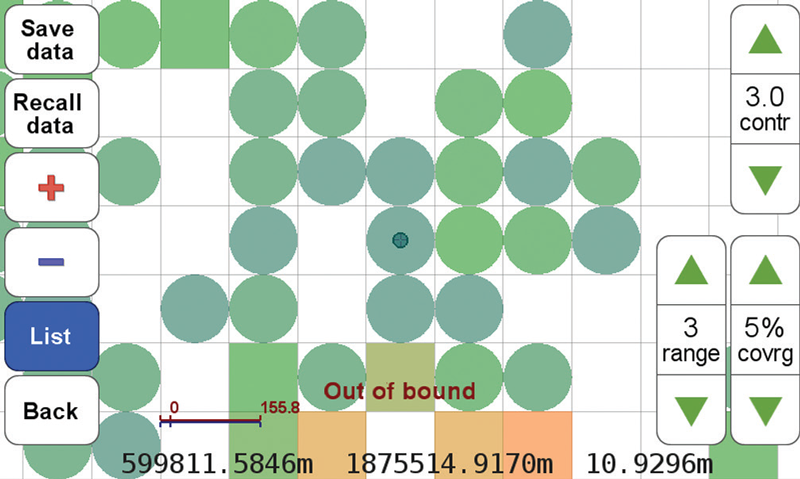
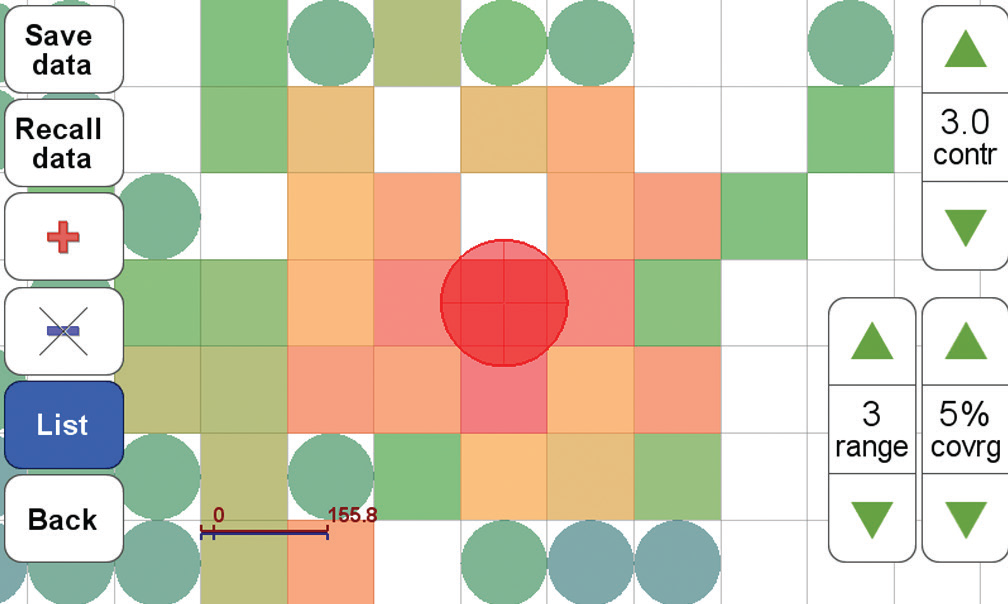
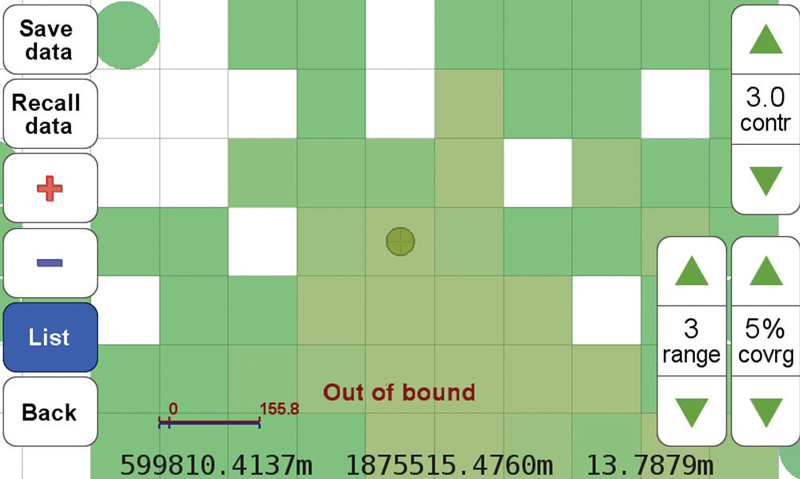
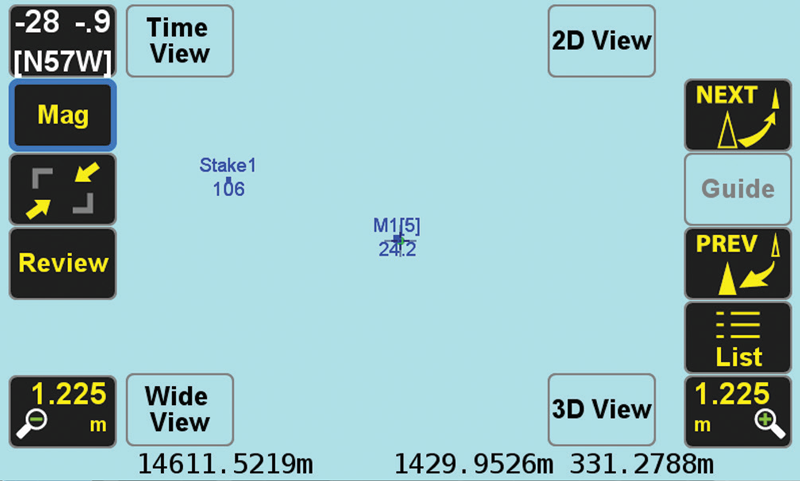
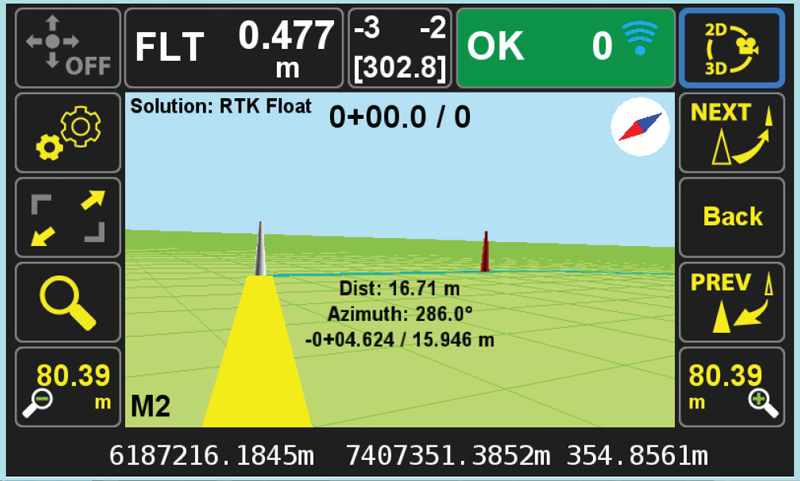
2D and 3D views of the field shows the magnetic objects that have been scanned.


Above: Wide View during data collection.
Right: Wide View when stopped and mag objects identified.
Below: Wide View zoomed.

Zooming the 2D screen can show the shape of the magnetic objects under the ground. To get to Zoom mode, touch the center of the screen first.

When scanning is stopped, mag data is processed and the location of mag objects are determined automatically based on three parameters of “Range”, “Coverage” and “Contrast”. Range is the number of cells on each side of the object to be evaluated. Range of 2 defines 8 cells as the surrounding cells (9-1). Coverage is the percentage of cells that must be scanned on each side for the peak to be considered as a mag object. Also the mag value of the peak must be “Contrast” number higher than the average of the mag values of the surrounding cells (Range cells). S and XYZ buttons select sensor and direction.


The mag data collected can be saved and recalled for further analysis and documentation. The “List” button lists the magnetic objects detected and their characteristics (Left). Zoom button shows details of the selected object (next page). Guide button guides to the selected item. Save button saves the selected objects as a point.

Center is the mag point and surrounding cells provide supporting data.

When zoomed to any selected point, the characteristics of the cells around the peak are shown. In figure on the left, there are three cells on each side of the peak (Range=3). Squares represent the positive and circles the negative cells. You can change the Contrast, Range and Coverage parameters and see the results.

Cell size is as selected in the Setup screen.


Squares are positive and circles are negative cells.
Save and Recall data for further data analysis.

Instantaneous Vector view.

Horizontal and vertical magnetic vectors show the instantaneous vectors from the current position to the mag point.

Below graphs show the Time View of the mag values of the sensors and their difference as scanning is in progress. Clicking on any graph shows its expanded view.


Time view of three components.
Expanded view of one component.

Field view

When you scan a large area, you can save all possible peak points, view them on the map and select the point with the highest peak to dig.

When you save a point, you can also save all the raw Mag sensor data for future view and documentation.

Work Flow


We have not only integrated a sophisticated magnetic locater in the TRIUMPH-LS, but we have also streamlined the whole process. First, the “Stakeout” screen will guide you towards the target.

Then the “Mag” screen locates your underground target and determines its coordinates. You can also save this point.

And finally in the “Collect” screen, you can survey the target point which you have dug up and exposed. This is also the time to use the built in camera of the TRIUMPH-LS to photograph and fully document the evidence which you have recovered.


Select tone and other audio characteristics in this screen.

The 60 musical tones. Arrange your own music.

Negative mag tone selection.

Mag View when J-Tip is not connected.

Tones and Musics

Click the Current Value box in the Mag Screen or the “Tone Settings” in the Advanced screen to make your own music for the audio tones. We have a fun system to make your tones as a function of the mag values. Click “Edit tones” to arrange your music.

We have selected all the 60 musical tones and eliminated the 7 tones that are harmful to the TRIUMPH-LS speaker due to its resonant frequency.

You can also selects which tones to be played. If you don’t like some tones, you can de-select them. Or select the “Every Other” tone to have more distinctions between the tones. You can select none to de-select all, but you have to add at least 20 tones for the selections to be accepted.

Tones will change non-linearly with the mag values according to the “Slope” setting. Setting of 1 makes changes linear which is appropriate for very weak mag objects. 0.2 is good for very strong mag objects. You can select 0.5 as your default.

Slope selection does not have much impact on finding your mag object, but it is fun to see how fast tones change according to mag values.

With “Minimum tone Step” you can select if the tone should change with small mag value changes or not.

With “Negative Tones” you can select tone types for negative mag values as below:

Same: positive and negative mag values will have similar tones.

Sine: Negative tones play sine wave tones.

Pause: Tones will be the same, but negative values will play with short pauses inserted.

High Pitch: There will be a high pitch inserted between tones for the tones.